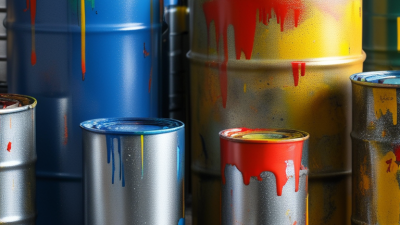
Paint cans may look simple, but each part affects storage, handling, and clean pouring. Paint Can Components work together to protect coatings from air, leaks, dents, and accidental spills. Small details matter.
This guide looks at seven useful parts: the can body, lid, sealing compound, opening, handle, handle attachments, and interior lining. The exact design varies by can size, material, and intended use. A sturdy body resists ordinary handling, while a close-fitting lid helps limit exposure after use. The seal matters too. Even a strong lid can fail to close well if paint collects around its rim.
Other features shape day-to-day use. A rolled pouring edge can help control drips, and a comfortable wire handle makes carrying easier. Handle tabs need secure attachment, especially when a full can is lifted. Interior coatings may also help reduce corrosion or unwanted interaction between the container and its contents, depending on the material and product.
There is no single perfect design. A lightweight can may be easier to carry, yet less resistant to dents. Some lids reseal neatly; others take patience and a proper closing tool. That can be frustrating. The sections ahead explain what each component does, what to inspect, and how design choices affect practical use. The goal is not to overpromise, but to help readers compare cans with clearer expectations.
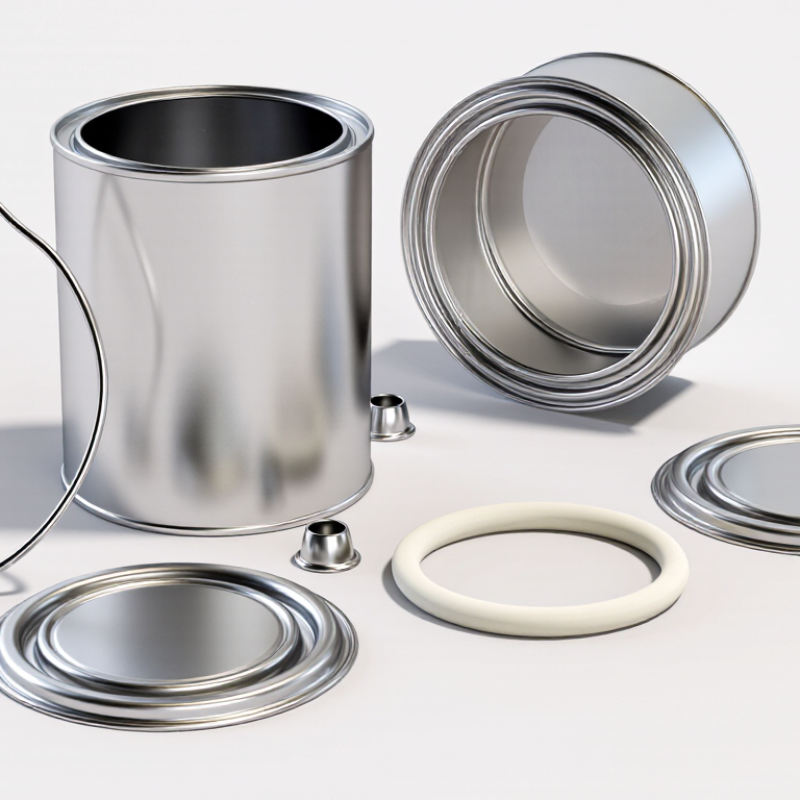
A standard paint can is a small package with several parts doing distinct jobs. The steel body holds the paint and must resist dents during ordinary handling. Inside, a protective lining helps separate the paint from bare metal. Its suitability depends on the paint formulation, so one lining does not fit every product. The side seam joins the sheet into a cylinder, while the bottom seam secures the base. These seams need consistent construction to help prevent leaks. Small details matter.
At the top, the rolled rim creates a seat for the lid and helps keep the opening firm. The lid closes the can and limits spills and exposure to air when fitted correctly. Some lids use a flexible sealing compound, though its condition and fit affect how well the closure works. The handle assembly includes a wire handle and two attachment points, often called ears. It makes a filled can easier to carry, but a bent ear can feel surprisingly weak. Not every can closes perfectly after repeated opening. Checking the rim for dried paint before replacing the lid is a practical habit, even if it is easy to forget.
Core components found in a common one-gallon steel paint can, shown by typical quantity per can.
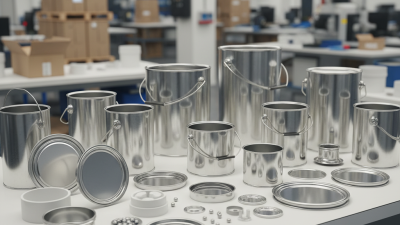
A typical design has one body, lid, wire handle, and continuous sealing-compound bead, plus two handle ears. The top and bottom chimes are formed features of the body, not separate pieces. Can designs may vary.
A paint can’s seven essential components each perform a practical job. The cylindrical body holds the paint and withstands routine carrying. The bottom panel closes the container and helps it sit steadily on a shelf. The upper rim, or chime, strengthens the opening and gives the lid a firm seating surface. A close-fitting lid keeps dust out and slows drying between painting sessions.
Small details matter.
A gasket, usually seated beneath the lid, helps create a tighter seal when the lid is pressed into place. The bail handle provides a way to carry the can; its curved wire should feel secure when the can is lifted. Two handle ears, also called lugs, anchor that wire to the body. Check them for looseness before carrying a full can. In use, even a lid that appears firmly closed may allow paint to dry around the rim if the edge is dirty. A quick wipe helps, though it is easy to forget.
A paint can must contain liquid, resist dents, and pour without leaving a sticky trail. Its body holds the paint, while the sealed bottom seam helps prevent leaks during storage and transport. The top chime stiffens the rim and gives the lid a secure seat. Small details matter.
A 2023 APEAL industry report recorded an 80.5% steel-packaging recycling rate in Europe for 2022. That figure covers steel packaging broadly, not paint cans alone, but it highlights the value of durable, recyclable metal components.
The lid closes the opening; a sealing compound or gasket helps block air and reduce spills. At the center, a removable plug gives controlled access for pouring or inserting a stirrer, though dried paint can make it stubborn. A formed pouring lip guides paint into a tray and helps limit drips. The wire handle, secured by side lugs, makes a full can easier to carry. I still check those lugs closely: a sound handle is useful, but a bent attachment can make carrying feel less secure. Each component has a small job, and their fit determines how well the can protects paint between uses.
A paint can performs as a system: its steel body resists dents, while the interior lining helps limit corrosion and unwanted interaction with the coating. The bottom seam must stay tight during filling and transport. At the opening, a smooth top chime gives the lid a consistent seating surface. A well-fitted lid and compatible gasket help reduce leaks and air exposure. The handle and its attachment lugs need to carry a full can without sharp flexing or loose joints. Small details matter.
Material choice depends on the paint, storage conditions, and handling. A lining that works for one formulation may not suit another, so compatibility testing is essential. ASTM D5276 describes a free-fall drop test for loaded containers; it offers a practical way to assess impact performance, though real handling varies. APEAL’s 2022 report puts Europe’s steel-packaging recycling rate at 82%. That figure covers steel packaging broadly, not paint cans alone, but it highlights why durable, recyclable steel remains relevant. Inspect the rim after repeated opening, too. It is easy to overlook. A slightly bent edge can compromise closure, even when the body still looks sound.
| Component | Common Materials | Key Design Features | How It Affects Performance | What to Check When Choosing |
|---|---|---|---|---|
| 1. Can body | Usually tin-plated steel; some containers use plastic, depending on the product and application. | Rolled cylindrical wall with a corrosion-resistant surface or internal coating selected for compatibility with the contents. | Provides structural support and helps protect paint from physical damage and, when properly specified, corrosion or product interaction. | Check for dents, rust, coating damage, and compatibility with the paint. The appropriate material depends on the formulation and storage conditions. |
| 2. Top chime | Formed steel, typically continuous with or securely attached to the body. | Curled or rolled rim that forms the opening and provides a seating surface for the lid. | A smooth, evenly formed chime helps the lid seat consistently and reduces the risk of leakage during handling. | Look for a uniform rim without sharp edges, gaps, dents, or deformation that could prevent proper lid fit. |
| 3. Lid or cover | Commonly tin-plated steel; some designs use plastic or other materials where suitable. | Press-fit or lever-lock design, often with a raised profile or shaped edge to engage the chime. | A well-fitting cover limits spills and exposure to air, helping protect the contents between uses. | Confirm that the closure style matches the can and can be securely opened and resealed with the intended tools. |
| 4. Sealing compound | Flexible polymeric sealing material applied around the lid perimeter; the formulation varies by closure and product requirements. | Often applied as a continuous ring within the lid channel to create contact with the can chime when closed. | Helps form a seal that can reduce leakage and air exchange. Seal performance depends on the material, fit, and condition of the closure. | Check that the seal is continuous, undamaged, and compatible with the contents. Not every can design uses a separate sealing compound. |
| 5. Bottom end and seam | Typically coated steel joined to the body by a mechanically formed double seam. | Interlocking folded layers create a closed bottom joint; seam design and dimensions are controlled during manufacture. | A sound seam helps contain the contents and withstand normal storage and transport stresses. | Inspect for leaks, corrosion, impact damage, or visible seam irregularities. Seam quality is best verified through appropriate manufacturing checks. |
| 6. Bail handle | Usually formed steel wire; handle grips may be made from plastic or another insulating material. | Movable wire loop sized and shaped to support carrying, with ends that connect to the can's handle attachments. | Provides a means to carry the container. Wire thickness, shape, and attachment quality influence handling comfort and load support. | Check for secure connections, smooth edges, corrosion, and a grip that is comfortable for the expected carrying task. |
| 7. Handle attachments | Commonly steel ears, lugs, or formed attachment points connected to the can body. | Paired supports hold the handle ends and allow the bail to pivot; attachment geometry should distribute load across the body wall. | Secure, well-positioned attachments help keep the handle aligned and reduce the chance of it pulling away during normal use. | Check both attachment points for looseness, sharp edges, corrosion, and damage to the surrounding can wall. |
A paint can works well when its parts fit together, not simply because each part looks sturdy. Check that the lid matches the rim and closes evenly without rocking. A sound seal helps limit spills and keeps paint from drying out. Choose a handle with secure attachments and a comfortable grip, especially for larger cans. Inspect the pouring edge, too; dents can cause messy drips. Small details count.
Tips: Before buying replacement parts, measure the can opening. After use, wipe paint from the rim and lid channel with a suitable cleaning cloth. Let components dry before closing the can. A little residue can stop a tight seal.
For routine care, look for rust, bent edges, cracked seals, and loose handle connections. Replace damaged parts rather than forcing them into place. Store cans upright in a cool, dry area, and avoid striking lids with hard tools. A rubber mallet can help seat a lid evenly, but gentle taps are enough. I would not assume a lid is sealed just because it appears flat; check all the way around. Paint can still skin over when the seal is imperfect. Regular checks take little time and can prevent wasted material.